reconnaissance
basic tools
Tools such as
SSH,Netcat,Tmux, andVimare essential and are used daily by most information security professionals. Although these tools are not intended to be penetration testing tools, they are critical to the penetration testing process, so we must master them.
SSH
Secure Shell is a network protocol that runs on port 22 by default and provides users such as system administrators a secure way to access a computer remotely. SSH can be configured with password authentication or passwordless using public-key authentication using an SSH public/private key pair. SSH can be used to remotely access systems on the same network, over the internet, facilitate connections to resources in other networks using port forwarding/proxying, and upload/download files to and from remote systems.
SSH uses a client-server model, connecting a user running an SSH client application such as OpenSSH to an SSH server. While attacking a box or during a real-world assessment, we often obtain cleartext credentials or an SSH private key that can be leveraged to connect directly to a system via SSH. An SSH connection is typically much more stable than a reverse shell connection and can often be used as a “jump host” to enumerate and attack other hosts in the network, transfer tools, set up persistence, etc. If we obtain a set of credentials, we can use SSH to login remotely to the server by using the username @ the remote server IP, as follows:
vosill@htb[/htb]$ ssh Bob@10.10.10.10
Bob@remotehosts password: *********
Bob@remotehost#
Title
This is a callout!
Are callouts foldable?
Yes! In a foldable callout, the contents are hidden when the callout is collapsed.
Can callouts be nested?
Yes!, they can.
You can even use multiple layers of nesting.
Callouts can have custom titles
Like this one.
Abstract
Lorem ipsum dolor sit amet
Success
Lorem ipsum dolor sit amet
It is also possible to read local private keys on a compromised system or add our public key to gain SSH access to a specific user, as we’ll discuss in a later section. As we can see, SSH is an excellent tool for securely connecting to a remote machine. It also provides a way for mapping local ports on the remote machine to our localhost, which can become handy at times.
Netcat
Netcat, ncat, or nc, is an excellent network utility for interacting with TCP/UDP ports. It can be used for many things during a pentest. Its primary usage is for connecting to shells, which we’ll discuss later in this module. In addition to that, netcat can be used to connect to any listening port and interact with the service running on that port. For example, SSH is programmed to handle connections over port 22 to send all data and keys. We can connect to TCP port 22 with netcat:
vosill@htb[/htb]$ netcat 10.10.10.10 22

SSH-2.0-OpenSSH_8.4p1 Debian-3
As we can see, port 22 sent us its banner, stating that SSH is running on it. This technique is called Banner Grabbing, and can help identify what service is running on a particular port. Netcat comes pre-installed in most Linux distributions. We can also download a copy for Windows machines from this link. There’s another Windows alternative to netcat coded in PowerShell called PowerCat. Netcat can also be used to transfer files between machines, as we’ll discuss later.
Another similar network utility is socat, which has a few features that netcat does not support, like forwarding ports and connecting to serial devices. Socat can also be used to upgrade a shell to a fully interactive TTY. We will see a few examples of this in a later section. Socat is a very handy utility that should be a part of every penetration tester’s toolkit. A standalone binary of Socat can be transferred to a system after obtaining remote code execution to get a more stable reverse shell connection.
Tmux
Terminal multiplexers, like tmux or Screen, are great utilities for expanding a standard Linux terminal’s features, like having multiple windows within one terminal and jumping between them. Let’s see some examples of using tmux, which is the more common of the two. If tmux is not present on our Linux system, we can install it with the following command:
vosill@htb[/htb]$ sudo apt install tmux -yOnce we have tmux, we can start it by entering tmux as our command: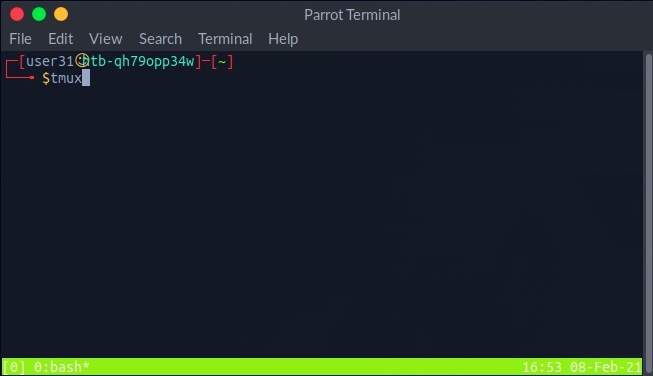
The default key to input tmux commands prefix is [CTRL + B]. In order to open a new window in tmux, we can hit the prefix ‘i.e. [CTRL + B] ’ and then hit C: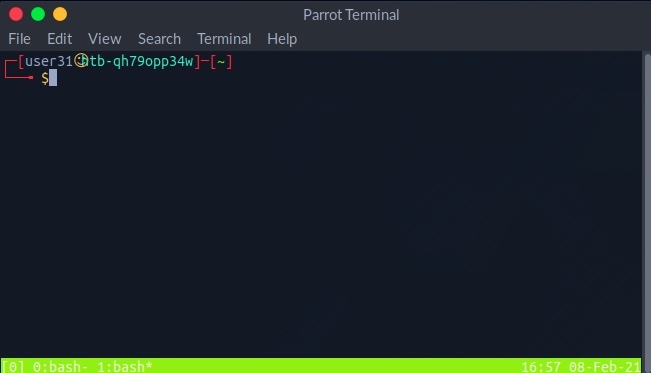
We see the numbered windows at the bottom. We can switch to each window by hitting the prefix and then inputting the window number, like 0 or 1. We can also split a window vertically into panes by hitting the prefix and then [SHIFT + %]: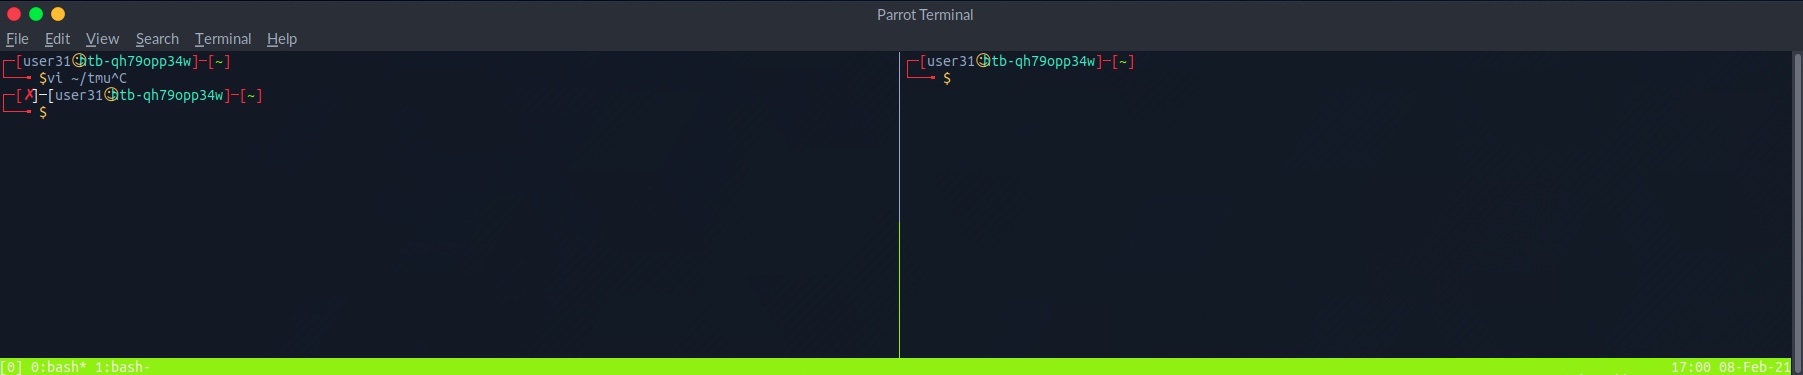
We can also split into horizontal panes by hitting the prefix and then [SHIFT + "]:
We can switch between panes by hitting the prefix and then the left or right arrows for horizontal switching or the up or down arrows for vertical switching. The commands above cover some basic tmux usage. It is a powerful tool and can be used for many things, including logging, which is very important during any technical engagement. This cheatsheet is a very handy reference. Also, this Introduction to tmux video by ippsec is worth your time.
Vim
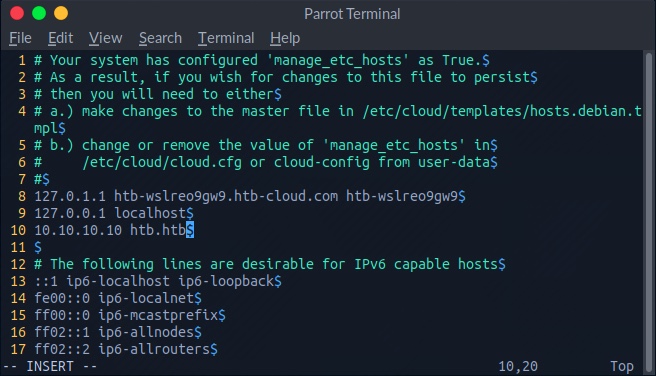
Vim is a great text editor that can be used for writing code or editing text files on Linux systems. One of the great benefits of using Vim is that it relies entirely on the keyboard, so you do not have to use the mouse, which (once we get the hold of it) will significantly increase your productivity and efficiency in writing/editing code. We usually find Vim or Vi installed on compromised Linux systems, so learning how to use it allows us to edit files even on remote systems. Vim also has many other features, like extensions and plugins, which can significantly extend its usage and make for a great code editor. Let’s see some of the basics of Vim. To open a file with Vim, we can add the file name after it:
vosill@htb[/htb]$ vim /etc/hosts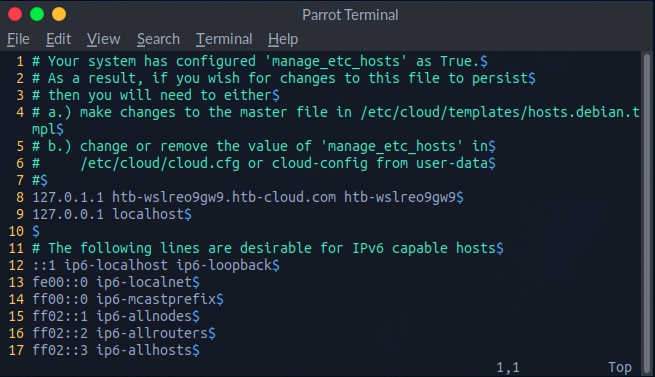
If we want to create a new file, input the new file name, and Vim will open a new window with that file. Once we open a file, we are in read-only normal mode, which allows us to navigate and read the file. To edit the file, we hit i to enter insert mode, shown by the ” -- INSERT -- ” at the bottom of Vim. Afterward, we can move the text cursor and edit the file:
Once we are finished editing a file, we can hit the escape key esc to get out of insert mode, back into normal mode. When we are in normal mode, we can use the following keys to perform some useful shortcuts:
| Command | Description |
|---|---|
x | Cut character |
dw | Cut word |
dd | Cut full line |
yw | Copy word |
yy | Copy full line |
p | Paste |
Tip: We can multiply any command to run multiple times by adding a number before it. For example, ‘4yw’ would copy 4 words instead of one, and so on.
If we want to save a file or quit Vim, we have to press: to go into command mode. Once we do, we will see any commands we type at the bottom of the vim window: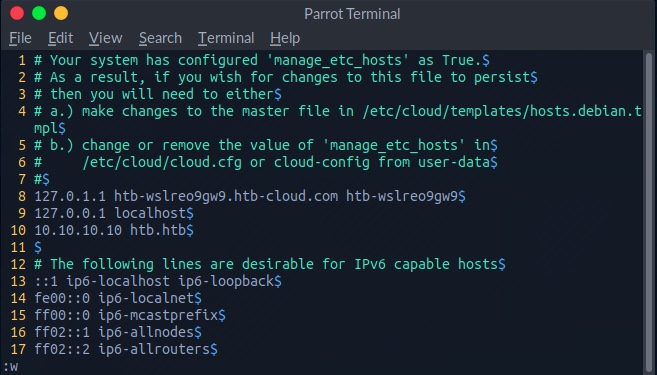
There are many commands available to us. The following are some of them:
| Command | Description |
|---|---|
:1 | Go to line number 1. |
:w | Write the file, save |
:q | Quit |
:q! | Quit without saving |
:wq | Write and quit |
Vim is a very powerful tool and has many other commands and features. This cheatsheet is an excellent resource for further unlocking the power of Vim.
vim cheatsheet
Cursor movement (Normal/Visual Mode)
hjkl- Arrow keysw/b- Next/previous wordW/B- Next/previous word (space separated)e/ge- Next/previous end of word0/$- Start/End of line^- First non-blank character of line (same as0w)
Editing text
i/a- Start insert mode at/after cursorI/A- Start insert mode at the beginning/end of the lineo/O- Add blank line below/above current lineEscorCtrl+[- Exit insert moded- Deletedd- Delete linec- Delete, then start insert modecc- Delete line, then start insert mode
Operators
- Operators also work in Visual Mode
d- Deletes from the cursor to the movement locationc- Deletes from the cursor to the movement location, then starts insert modey- Copy from the cursor to the movement location>- Indent one level<- Unindent one level- You can also combine operators with motions. Ex:
d$deletes from the cursor to the end of the line.
Marking text (visual mode)
v- Start visual modeV- Start linewise visual modeCtrl+v- Start visual block modeEscorCtrl+[- Exit visual mode
Clipboard
yy- Yank (copy) a linep- Paste after cursorP- Paste before cursordd- Delete (cut) a linex- Delete (cut) current characterX- Delete (cut) previous characterd/c- By default, these copy the deleted text
Exiting
:w- Write (save) the file, but don’t quit:wq- Write (save) and quit:q- Quit (fails if anything has changed):q!- Quit and throw away changes
Search/Replace
/pattern- Search for pattern?pattern- Search backward for patternn- Repeat search in same directionN- Repeat search in opposite direction:%s/old/new/g- Replace all old with new throughout file (gn is better though):%s/old/new/gc- Replace all old with new throughout file with confirmations
General
u- UndoCtrl+r- Redo
Advanced Cursor movement
Ctrl+d- Move down half a pageCtrl+u- Move up half a page}- Go forward by paragraph (the next blank line){- Go backward by paragraph (the next blank line)gg- Go to the top of the pageG- Go the bottom of the page: [num] [enter]- Go to that line in the documentctrl+e / ctrl+y- Scroll down/up one linef [char]- Move forward to the given charF [char]- Move backward to the given chart [char]- Move forward to before the given charT [char]- Move backward to before the given char;/,- Repeat search forwards/backwards
Advanced Editing text
J- Join line below to the current oner [char]- Replace a single character with the specified char (does not use Insert mode)
#Visual mode
O- Move to other corner of blocko- Move to other end of marked area
File Tabs
:e filename- Edit a file:tabe- Make a new tabgt- Go to the next tabgT- Go to the previous tab:vsp- Vertically split windowsctrl+ws- Split windows horizontallyctrl+wv- Split windows verticallyctrl+ww- Switch between windowsctrl+wq- Quit a window
Marks
- Marks allow you to jump to designated points in your code.
m{a-z}- Set mark {a-z} at cursor position- A capital mark {A-Z} sets a global mark and will work between files
'{a-z}- Move the cursor to the start of the line where the mark was set''- Go back to the previous jump location
Text Objects
- Say you have
def (arg1, arg2, arg3), where your cursor is somewhere in the middle of the parenthesis. di(deletes everything between the parenthesis. That says “change everything inside the nearest parenthesis”. Without text objects, you would need to doT(dt).- Learn more
General
.- Repeat last commandCtrl+r + 0in insert mode inserts the last yanked text (or in command mode)gv- reselect (select last selected block of text, from visual mode)%- jumps between matching()or{}
Making VIM actually useful
Vim is quite unpleasant out of the box. It’s an arcane experience:
- Autocomplete is missing
- System clipboard is not used
- Act of typing
:wto save is cumbersome - Mouse doesn’t work
- Management of multiple files is tricky
- Integration with other plugins (like compiler warnings) is challenging
- Repeatedly indenting/unindenting multiple lines is challenging, though possible
It does have a significant strength though: your fingers can stay on the main keyboard keys to do most editing actions. This is faster and more ergonomic. I find that the toughest part about VIM is guiding people towards getting the benefits of VIM without the drawbacks. Here are some ideas on how to go about this.
Switch caps lock and escape
- I highly recommend you switch the mapping of your caps lock and escape keys. You’ll love it, promise! Switching the two keys is platform dependent.
Visual Studio Code
- VSCode is the simplest way to give you a fantastic editor that also gives you the benefits of VIM. Just install the VIM extension.
- I made a few slight changes which improved the experience for me.
Configure native VIM
For all the given limitations, you’ll need to find a solution. You can either solve the issues one by one, or you can use a reference.vimrc settings file that fix most of the issues out-of-the-box.
- My.vimrc file could be a good starting point. Honestly, it’s a bit old and not the best. I now use VSCode mainly so I haven’t kept a great vimrc.
Using the system clipboard
"+ycopy a selection to the system clipboard"+ppaste from the system clipboard- If this doesn’t work, it’s probably because Vim was not built with the system clipboard option. To check, run
vim --versionand see if+clipboardexists. If it says-clipboard, you will not be able to copy from outside of Vim.- For Mac users, homebrew install Vim with the clipboard option. Install homebrew and then run
brew install vim.- then move the old Vim binary:
$ mv /usr/bin/vim /usr/bin/vimold - restart your terminal and you should see
vim --versionnow with+clipboard
- then move the old Vim binary:
- For Mac users, homebrew install Vim with the clipboard option. Install homebrew and then run
Additional resources
- Advanced Vim
- Practical Vim is a fantastic resource on many of the useful hidden features of vim.
network services recon
We’re ready to take it a step further and start exploring a machine! The first thing we need to do is identify the operating system and any available services that might be running. A service is an application running on a computer that performs some useful function for other users or computers. We call these specialized machines that host these useful services “servers” instead of workstations, allowing users to interact with and consume these various services. What we’re interested in are services that have either been misconfigured or have a vulnerability. Instead of performing the actions expected as part of the service, we are interested to see if we can coerce the service into performing some unintended action that supports our objectives, such as executing a command of our choosing.
Computers are assigned an IP address, which allows them to be uniquely identified and accessible on a network. The services running on these computers may be assigned a port number to make the service accessible. As discussed prior, port numbers range from 1 to 65,535, with the range of well-known ports 1 to 1,023 being reserved for privileged services. Port 0 is a reserved port in TCP/IP networking and is not used in TCP or UDP messages. If anything attempts to bind to port 0 (such as a service), it will bind to the next available port above port 1,024 because port 0 is treated as a “wild card” port.
To access a service remotely, we need to connect using the correct IP address and port number and use a language that the service understands. Manually examining all of the 65,535 ports for any available services would be laborious, and so tools have been created to automate this process and scan the range of ports for us. One of the most commonly used scanning tools is Nmap(Network Mapper).
Nmap
Let us start with the most basic scan. Suppose that we want to perform a basic scan against a target residing at 10.129.42.253. To do this we should type nmap 10.129.42.253 and hit return. We see that the Nmap scan was completed very quickly. This is because if we don’t specify any additional options, Nmap will only scan the 1,000 most common ports by default. The scan output reveals that ports 21, 22, 80, 139, and 445 are available.
vosill@htb[/htb]$ nmap 10.129.42.253

Starting Nmap 7.80 ( https://nmap.org ) at 2021-02-25 16:07 EST
Nmap scan report for 10.129.42.253
Host is up (0.11s latency).
Not shown: 995 closed ports
PORT    STATE SERVICE
21/tcp  open  ftp
22/tcp  open  ssh
80/tcp  open  http
139/tcp open  netbios-ssn
445/tcp open  microsoft-ds

Nmap done: 1 IP address (1 host up) scanned in 2.19 seconds
Under the PORT heading, it also tells us that these are TCP ports. By default, Nmap will conduct a TCP scan unless specifically requested to perform a UDP scan.
The STATE heading confirms that these ports are open. Sometimes we will see other ports listed that have a different state, such as filtered. This can happen if a firewall is only allowing access to the ports from specific addresses.
The SERVICE heading tells us the service’s name is typically mapped to the specific port number. However, the default scan will not tell us what is listening on that port. Until we instruct Nmap to interact with the service and attempt to tease out identifying information, it could be another service altogether.
As we gain familiarity, we will notice that several ports are commonly associated with Windows or Linux. For example, port 3389 is the default port for Remote Desktop Services and is an excellent indication that the target is a Windows machine. In our current scenario, port 22 (SSH) being available indicates that the target is running Linux/Unix, but this service can also be configured on Windows. Let us run a more advanced Nmap scan and gather more information about the target device.
We can use the -sC parameter to specify that Nmap scripts should be used to try and obtain more detailed information. The -sV parameter instructs Nmap to perform a version scan. In this scan, Nmap will fingerprint services on the target system and identify the service protocol, application name, and version. The version scan is underpinned by a comprehensive database of over 1,000 service signatures. Finally, -p- tells Nmap that we want to scan all 65,535 TCP ports.
nmap service scanning
vosill@htb[/htb]$ nmap -sV -sC -p- 10.129.42.253

Starting Nmap 7.80 ( https://nmap.org ) at 2021-02-25 16:18 EST
Nmap scan report for 10.129.42.253
Host is up (0.11s latency).
Not shown: 65530 closed ports
PORT    STATE SERVICE     VERSION
21/tcp  open  ftp         vsftpd 3.0.3
| ftp-anon: Anonymous FTP login allowed (FTP code 230)
|_drwxr-xr-x    2 ftp      ftp          4096 Feb 25 19:25 pub
| ftp-syst:
|   STAT:
| FTP server status:
|      Connected to ::ffff:10.10.14.2
|      Logged in as ftp
|      TYPE: ASCII
|      No session bandwidth limit
|      Session timeout in seconds is 300
|      Control connection is plain text
|      Data connections will be plain text
|      At session startup, client count was 2
|      vsFTPd 3.0.3 - secure, fast, stable
|_End of status
22/tcp  open  ssh         OpenSSH 8.2p1 Ubuntu 4ubuntu0.1 (Ubuntu Linux;protocol 2.0)
80/tcp  open  http        Apache httpd 2.4.41 ((Ubuntu))
|_http-server-header: Apache/2.4.41 (Ubuntu)
|_http-title: PHP 7.4.3 - phpinfo()
139/tcp open  netbios-ssn Samba smbd 4.6.2
445/tcp open  netbios-ssn Samba smbd 4.6.2
Service Info: OSs: Unix, Linux; CPE: cpe:/o:linux:linux_kernel

Host script results:
|_nbstat: NetBIOS name: GS-SVCSCAN, NetBIOS user: <unknown>, NetBIOS MAC: <unknown> (unknown)
| smb2-security-mode:
|   2.02:
|_    Message signing enabled but not required
| smb2-time:
|   date: 2021-02-25T21:21:51
|_  start_date: N/A
This returns a lot more information. We see that it took a lot longer to scan 65,535 ports than 1,000 ports. The -sC and -sV options also increase the duration of a scan, as instead of performing a simple TCP handshake, they perform a lot more checks. We notice that this time there is a VERSION heading, which reports the service version and the operating system if this is possible to identify.
So far, we know that the operating system is Ubuntu Linux. Application versions can also help reveal the target OS version. Take OpenSSH, for example. We see the reported version is OpenSSH 8.2p1 Ubuntu 4ubuntu0.1. From inspection of other Ubuntu SSH package web search , we see the release version takes the format 1:7.3p1-1ubuntu0.1. Updating our version to fit this format, we get 1:8.2p1-4ubuntu0.1. A quick search for this version online reveals that it is included in Ubuntu Linux Focal Fossa 20.04.
Another quick web search reveals that the release date of this OS is April 23rd, 2020.
However, it is worth noting that this cross-referencing technique is not entirely reliable, as it is possible to install more recent application packages on an older OS version. The script scan -sC flag causes Nmap to report the server headers http-server-header page and the page title http-title for any web page hosted on the webserver. The web page title PHP 7.4.3 - phpinfo() indicates that this is a PHPInfo file, which is often manually created to confirm that PHP has been successfully installed. The title (and PHPInfo page) also reveals the PHP version, which is worth noting if it is vulnerable.
Nmap Scripts
Specifying -sC will run many useful default scripts against a target, but there are cases when running a specific script is required. For example, in an assessment scope, we may be asked to audit a large Citrix installation. We could use web search Nmap script to audit for the severe Citrix NetScaler vulnerability web search, while Nmap also has other scripts to audit a Citrix installation.
vosill@htb[/htb]$ locate scripts/citrix

/usr/share/nmap/scripts/citrix-brute-xml.nse
/usr/share/nmap/scripts/citrix-enum-apps-xml.nse
/usr/share/nmap/scripts/citrix-enum-apps.nse
/usr/share/nmap/scripts/citrix-enum-servers-xml.nse
/usr/share/nmap/scripts/citrix-enum-servers.nse
The syntax for running an Nmap script is nmap —script script name> -p port host
Nmap scripts are a great way to enhance our scans’ functionality, and inspection of the available options will pay dividends. Check out the Network Enumeration with Nmap module for a more detailed study of the Nmap tool.
attacking network services
Banner Grabbing
As previously discussed, banner grabbing is a useful technique to fingerprint a service quickly. Often a service will look to identify itself by displaying a banner once a connection is initiated. Nmap will attempt to grab the banners if the syntax nmap -sV —script=banner
vosill@htb[/htb]$ nc -nv 10.129.42.253 21

(UNKNOWN) [10.129.42.253] 21 (ftp) open
220 (vsFTPd 3.0.3)
This reveals that the version of vsFTPd on the server is 3.0.3. We can also automate this process using Nmap’s powerful scripting engine: nmap -sV —script=banner -p21 10.10.10.0/24.
FTP
It is worth gaining familiarity with FTP, as it is a standard protocol, and this service can often contain interesting data. A Nmap scan of the default port for FTP (21) reveals the vsftpd 3.0.3 installation that we identified previously. Further, it also reports that anonymous authentication is enabled and that a pub directory is available.
vosill@htb[/htb]$ nmap -sC -sV -p21 10.129.42.253
Starting Nmap 7.80 ( https://nmap.org ) at 2020-12-20 00:54 GMT
Nmap scan report for 10.129.42.253
Host is up (0.081s latency).

PORT   STATE SERVICE VERSION
21/tcp open  ftp     vsftpd 3.0.3
| ftp-anon: Anonymous FTP login allowed (FTP code 230)
|_drwxr-xr-x    2 ftp      ftp          4096 Dec 19 23:50 pub
| ftp-syst:
|   STAT:
| FTP server status:
|      Connected to ::ffff:10.10.14.2
|      Logged in as ftp
|      TYPE: ASCII
|      No session bandwidth limit
|      Session timeout in seconds is 300
|      Control connection is plain text
|      Data connections will be plain text
|      At session startup, client count was 3
|      vsFTPd 3.0.3 - secure, fast, stable
|_End of status
Service Info: OS: Unix

Service detection performed. Please report any incorrect results at https://nmap.org/submit/ .
 Nmap done: 1 IP address (1 host up) scanned in 1.78 seconds
Let us connect to the service using the ftp command-line utility.
vosill@htb[/htb]$ ftp -p 10.129.42.253

Connected to 10.129.42.253.
220 (vsFTPd 3.0.3)
Name (10.129.42.253:user): anonymous
230 Login successful.
Remote system type is UNIX.
Using binary mode to transfer files.

ftp> ls
227 Entering Passive Mode (10,129,42,253,158,60).
150 Here comes the directory listing.
drwxr-xr-x    2 ftp      ftp          4096 Feb 25 19:25 pub
226 Directory send OK.

ftp> cd pub
250 Directory successfully changed.

ftp> ls
227 Entering Passive Mode (10,129,42,253,182,129).
150 Here comes the directory listing.
-rw-r--r--    1 ftp      ftp            18 Feb 25 19:25 login.txt
226 Directory send OK.

ftp> get login.txt
local: login.txt remote: login.txt
227 Entering Passive Mode (10,129,42,253,181,53).
150 Opening BINARY mode data connection for login.txt (18 bytes).
226 Transfer complete.
18 bytes received in 0.00 secs (165.8314 kB/s)

ftp> exit
221 Goodbye.
In the above shell, we see that FTP supports common commands such as cd and ls and allows us to download files using the get command. Inspection of the downloaded login.txt reveals credentials that we could use to further our access to the system.
vosill@htb[/htb]$ cat login.txt
admin:ftp@dmin123
SMB
SMB (Server Message Block) is a prevalent protocol on Windows machines that provides many vectors for vertical and lateral movement. Sensitive data, including credentials, can be in network file shares, and some SMB versions may be vulnerable to RCE exploits such as EternalBlue. It is crucial to enumerate this sizeable potential attack surface carefully. Nmap has many scripts for enumerating SMB, such as smb-os-discovery.nse, which will interact with the SMB service to extract the reported operating system version.
vosill@htb[/htb]$ nmap --script smb-os-discovery.nse -p445 10.10.10.40

Starting Nmap 7.91 ( https://nmap.org ) at 2020-12-27 00:59 GMT
Nmap scan report for doctors.htb (10.10.10.40)
Host is up (0.022s latency).

PORT    STATE SERVICE
445/tcp open  microsoft-ds

Host script results:
| smb-os-discovery:
|   OS: Windows 7 Professional 7601 Service Pack 1 (Windows 7 Professional 6.1)
|   OS CPE: cpe:/o:microsoft:windows_7::sp1:professional
|   Computer name: CEO-PC
|   NetBIOS computer name: CEO-PC\x00
|   Workgroup: WORKGROUP\x00
|_  System time: 2020-12-27T00:59:46+00:00

Nmap done: 1 IP address (1 host up) scanned in 2.71 seconds
In this case, the host runs a legacy Windows 7 OS, and we could conduct further enumeration to confirm if it is vulnerable to EternalBlue. The Metasploit Framework has several modules for EternalBlue that can be used to validate the vulnerability and exploit it, as we will see in a coming section. We can run a scan against our target for this module section to gather information from the SMB service. We can ascertain that the host runs a Linux kernel, Samba version 4.6.2, and the hostname is GS-SVCSCAN.
vosill@htb[/htb]$ nmap -A -p445 10.129.42.253

Starting Nmap 7.80 ( https://nmap.org ) at 2021-02-25 16:29 EST
Nmap scan report for 10.129.42.253
Host is up (0.11s latency).

PORT    STATE SERVICE     VERSION
445/tcp open  netbios-ssn Samba smbd 4.6.2
Warning: OSScan results may be unreliable because we could not find at least 1 open and 1 closed port
Aggressive OS guesses: Linux 2.6.32 (95%), Linux 3.1 (95%), Linux 3.2 (95%), AXIS 210A or 211 Network Camera (Linux 2.6.17) (94%), ASUS RT-N56U WAP (Linux 3.4) (93%), Linux 3.16 (93%), Adtran 424RG FTTH gateway (92%), Linux 2.6.39 - 3.2 (92%), Linux 3.1 - 3.2 (92%), Linux 3.2 - 4.9 (92%)
No exact OS matches for host (test conditions non-ideal).
Network Distance: 2 hops

Host script results:
|_nbstat: NetBIOS name: GS-SVCSCAN, NetBIOS user: <unknown>, NetBIOS MAC: <unknown> (unknown)
| smb2-security-mode:
|   2.02:
|_    Message signing enabled but not required
| smb2-time:
|   date: 2021-02-25T21:30:06
|_  start_date: N/A

TRACEROUTE (using port 445/tcp)
HOP RTT       ADDRESS
1   111.62 ms 10.10.14.1
2   111.89 ms 10.129.42.253

OS and Service detection performed. Please report any incorrect results at https://nmap.org/submit/ .
Nmap done: 1 IP address (1 host up) scanned in 12.72 seconds
smb shares
SMB allows users and administrators to share folders and make them accessible remotely by other users. Often these shares have files in them that contain sensitive information such as passwords. A tool that can enumerate and interact with SMB shares is smbclient. The -L flag specifies that we want to retrieve a list of available shares on the remote host, while -N suppresses the password prompt.
vosill@htb[/htb]$ smbclient -N -L \\\\10.129.42.253

Sharename       Type      Comment
---------       ----      -------
print$          Disk      Printer Drivers
users           Disk
IPC$            IPC       IPC Service (gs-svcscan server (Samba, Ubuntu))
SMB1 disabled -- no workgroup available
This reveals the non-default share users. Let us attempt to connect as the guest user.
    vosill@htb[/htb]$ smbclient \\\\10.129.42.253\\users

    Enter WORKGROUP\users's password:
    Try "help" to get a list of possible commands.

    smb: \> ls
    NT_STATUS_ACCESS_DENIED listing \*

    smb: \> exit
The ls command resulted in an access denied message, indicating that guest access is not permitted. Let us try again using credentials for the user bob (bob:Welcome1).
vosill@htb[/htb]$ smbclient -U bob \\\\10.129.42.253\\users

Enter WORKGROUP\bob's password:
Try "help" to get a list of possible commands.

smb: \> ls
.                                   D        0  Thu Feb 25 16:42:23 2021
 ..                                  D        0  Thu Feb 25 15:05:31 2021
  bob                                 D        0  Thu Feb 25 16:42:23 2021

     4062912 blocks of size 1024. 1332480 blocks available

smb: \> cd bob

smb: \bob\> ls
  .                                   D        0  Thu Feb 25 16:42:23 2021
  ..                                  D        0  Thu Feb 25 16:42:23 2021
  passwords.txt                       N      156  Thu Feb 25 16:42:23 2021

  4062912 blocks of size 1024. 1332480 blocks available

smb: \bob\> get passwords.txt
getting file \bob\passwords.txt of size 156 as passwords.txt (0.3 KiloBytes/sec) (average 0.3 KiloBytes/sec)
We successfully gained access to the users share using credentials and gained access to the interesting file passwords.txt, which can be downloaded with the get command.
smbclient Cheatsheet
cheatsheet
Connect to a Share
smbclient //TARGET_IP/SHARENAME -U usernameAnonymous:
smbclient //10.10.10.5/public -N-N = no password prompt
List Shares on Target
smbclient -L //TARGET_IP -U usernameAnonymous:
smbclient -L //TARGET_IP -NInside smbclient Shell
Once connected, you’ll see smb: \>. Commands here are similar to FTP:
ls→ list filescd dir→ change directoryget file.txt→ download fileput file.txt→ upload filemget *→ download multiple filesprompt→ toggle interactive yes/no prompts (useful withmget)recurse→ toggle recursive mode for directorieslcd /path/to/local/dir→ change local directory for downloads
Non-Interactive One-Liners
Download a file directly:
smbclient //TARGET_IP/SHARE -U user%password -c "get secrets.txt"Recursive copy everything:
smbclient //TARGET_IP/SHARE -U user%password -c "prompt OFF; recurse ON; mget *"Mount Share as Filesystem (Alternative to smbclient shell)
Install cifs-utils if not already:
sudo apt install cifs-utils -yMount share:
sudo mount -t cifs //TARGET_IP/SHARENAME /mnt/smb -o username=user,password=pass,uid=$(id -u),gid=$(id -g)Unmount:
sudo umount /mnt/smbPro tip:
For CTF/pentesting, start with:
smbclient -L //TARGET_IP -Nto see what’s open without creds, then try enumerating with guest, anonymous, or known accounts.
SNMP
SNMP Community strings provide information and statistics about a router or device, helping us gain access to it. The manufacturer default community strings of public and private are often unchanged. In SNMP versions 1 and 2c, access is controlled using a plaintext community string, and if we know the name, we can gain access to it. Encryption and authentication were only added in SNMP version 3. Much information can be gained from SNMP. Examination of process parameters might reveal credentials passed on the command line, which might be possible to reuse for other externally accessible services given the prevalence of password reuse in enterprise environments. Routing information, services bound to additional interfaces, and the version of installed software can also be revealed.
vosill@htb[/htb]$ snmpwalk -v 2c -c public 10.129.42.253 1.3.6.1.2.1.1.5.0

iso.3.6.1.2.1.1.5.0 = STRING: "gs-svcscan"
vosill@htb[/htb]$ snmpwalk -v 2c -c private 10.129.42.253
Timeout: No Response from 10.129.42.253A tool such as onesixtyone can be used to brute force the community string names using a dictionary file of common community strings such as the dict.txt file included in the GitHub repo for the tool.
    vosill@htb[/htb]$ onesixtyone -c dict.txt 10.129.42.254

    Scanning 1 hosts, 51 communities
    10.129.42.254 [public] Linux gs-svcscan 5.4.0-66-generic #74-Ubuntu SMP Wed Jan 27 22:54:38 UTC 2021 x86_64
web recon
When performing service scanning, we will often run into web servers running on ports 80 and 443. Webservers host web applications (sometimes more than 1) which often provide a considerable attack surface and a very high-value target during a penetration test. Proper web enumeration is critical, especially when an organization is not exposing many services or those services are appropriately patched.
Gobuster
After discovering a web application, it is always worth checking to see if we can uncover any hidden files or directories on the webserver that are not intended for public access. We can use a tool such as ffuf or GoBuster to perform this directory enumeration. Sometimes we will find hidden functionality or pages/directories exposing sensitive data that can be leveraged to access the web application or even remote code execution on the web server itself.
Directory/File Enumeration
GoBuster is a versatile tool that allows for performing DNS, vhost, and directory brute-forcing. The tool has additional functionality, such as enumeration of public AWS S3 buckets. For this module’s purposes, we are interested in the directory (and file) brute-forcing modes specified with the switch dir. Let us run a simple scan using the dirb common.txt wordlist.
vosill@htb[/htb]$ gobuster dir -u http://10.10.10.121/ -w /usr/share/seclists/Discovery/Web-Content/common.txt

===============================================================
Gobuster v3.0.1
by OJ Reeves (@TheColonial) & Christian Mehlmauer (@_FireFart_)
===============================================================
[+] Url:            http://10.10.10.121/
[+] Threads:        10
[+] Wordlist:       /usr/share/seclists/Discovery/Web-Content/common.txt
[+] Status codes:   200,204,301,302,307,401,403
[+] User Agent:     gobuster/3.0.1
[+] Timeout:        10s
===============================================================
2020/12/11 21:47:25 Starting gobuster
===============================================================
/.hta (Status: 403)
/.htpasswd (Status: 403)
/.htaccess (Status: 403)
/index.php (Status: 200)
/server-status (Status: 403)
/wordpress (Status: 301)
===============================================================
2020/12/11 21:47:46 Finished===============================================================
An HTTP status code of 200 reveals that the resource’s request was successful, while a 403 HTTP status code indicates that we are forbidden to access the resource. A 301 status code indicates that we are being redirected, which is not a failure case. It is worth familiarizing ourselves with the various HTTP status codes, which can be found here. The Web Requests Academy Module also covers HTTP status codes further in-depth.
The scan was completed successfully, and it identifies a WordPress installation at /wordpress. WordPress is the most commonly used CMS (Content Management System) and has an enormous potential attack surface. In this case, visiting http://10.10.10.121/wordpress in a browser reveals that WordPress is still in setup mode, which will allow us to gain remote code execution (RCE) on the server.
DNS Subdomain Enumeration
There also may be essential resources hosted on subdomains, such as admin panels or applications with additional functionality that could be exploited. We can use GoBuster to enumerate available subdomains of a given domain using the dns flag to specify DNS mode. First, let us clone the SecLists GitHub repo, which contains many useful lists for fuzzing and exploitation:
Install SecLists
vosill@htb[/htb]$ git clone https://github.com/danielmiesslerSecLists

vosill@htb[/htb]$ sudo apt install seclists -y
Next, add a DNS Server such as 1.1.1.1 to the /etc/resolv.conf file. We will target the domain inlanefreight.com, the website for a fictional freight and logistics company.
vosill@htb[/htb]$ gobuster dns -d inlanefreight.com -w /usr/share/SecLists
Discovery/DNS/namelist.txt

===============================================================
Gobuster v3.0.1
by OJ Reeves (@TheColonial) & Christian Mehlmauer (@_FireFart_)
===============================================================
[+] Domain:     inlanefreight.com
[+] Threads:    10
[+] Timeout:    1s
[+] Wordlist:   /usr/share/SecLists/Discovery/DNS/namelist.txt
===============================================================
2020/12/17 23:08:55 Starting gobuster
===============================================================
Found: blog.inlanefreight.com
Found: customer.inlanefreight.com
Found: my.inlanefreight.com
Found: ns1.inlanefreight.com
Found: ns2.inlanefreight.com
Found: ns3.inlanefreight.com
===============================================================
2020/12/17 23:10:34 Finished
===============================================================
This scan reveals several interesting subdomains that we could examine further. The Attacking Web Applications with Ffuf module goes into more details about web enumeration and fuzzing.
Web recon Tips
Let us walk through a few additional web enumeration tips that will help complete machines on HTB and in the real world.
Banner Grabbing / Web Server Headers
In the last section, we discussed banner grabbing for general purposes. Web server headers provide a good picture of what is hosted on a web server. They can reveal the specific application framework in use, the authentication options, and whether the server is missing essential security options or has been misconfigured. We can use cURL to retrieve server header information from the command line. cURL is another essential addition to our penetration testing toolkit, and familiarity with its many options is encouraged.
vosill@htb[/htb]$ curl -IL https://www.inlanefreight.com

    HTTP/1.1 200 OK
    Date: Fri, 18 Dec 2020 22:24:05 GMT
    Server: Apache/2.4.29 (Ubuntu)
    Link: <https://www.inlanefreight.com/index.php/wp-json/>; rel="https://api.w.org/"
    Link: <https://www.inlanefreight.com/>; rel=shortlink
    Content-Type: text/html; charset=UTF-8
eyewitness Another handy tool is EyeWitness, which can be used to take screenshots of target web applications, fingerprint them, and identify possible default credentials.
Whatweb We can extract the version of web servers, supporting frameworks, and applications using the command-line tool whatweb. This information can help us pinpoint the technologies in use and begin to search for potential vulnerabilities.
    vosill@htb[/htb]$ whatweb 10.10.10.121

    http://10.10.10.121 [200 OK] Apache[2.4.41], Country[RESERVED][ZZ], Email[license@php.net], HTTPServer[Ubuntu Linux][Apache/2.4.41 (Ubuntu)], IP[10.10.10.121], Title[PHP 7.4.3 - phpinfo()]
Whatweb is a handy tool and contains much functionality to automate web application enumeration across a network.
vosill@htb[/htb]$ whatweb --no-errors 10.10.10.0/24

http://10.10.10.11 [200 OK] Country[RESERVED][ZZ], HTTPServer[nginx/1.14.1], IP[10.10.10.11], PoweredBy[Red,nginx], Title[Test Page for the Nginx HTTP Server on Red Hat Enterprise Linux], nginx[1.14.1]
http://10.10.10.100 [200 OK] Apache[2.4.41], Country[RESERVED][ZZ], HTTPServer[Ubuntu Linux][Apache/2.4.41 (Ubuntu)], IP[10.10.10.100], Title[File Sharing Service]
http://10.10.10.121 [200 OK] Apache[2.4.41], Country[RESERVED][ZZ], Email[license@php.net], HTTPServer[Ubuntu Linux][Apache/2.4.41 (Ubuntu)], IP[10.10.10.121], Title[PHP 7.4.3 - phpinfo()]
http://10.10.10.247 [200 OK] Bootstrap, Country[RESERVED][ZZ], Email[contact@cross-fit.htb], Frame, HTML5, HTTPServer[OpenBSD httpd], IP[10.10.10.247], JQuery[3.3.1], PHP[7.4.12], Script, Title[Fine Wines], X-Powered-By[PHP/7.4.12], X-UA-Compatible[ie=edge]
Certificates
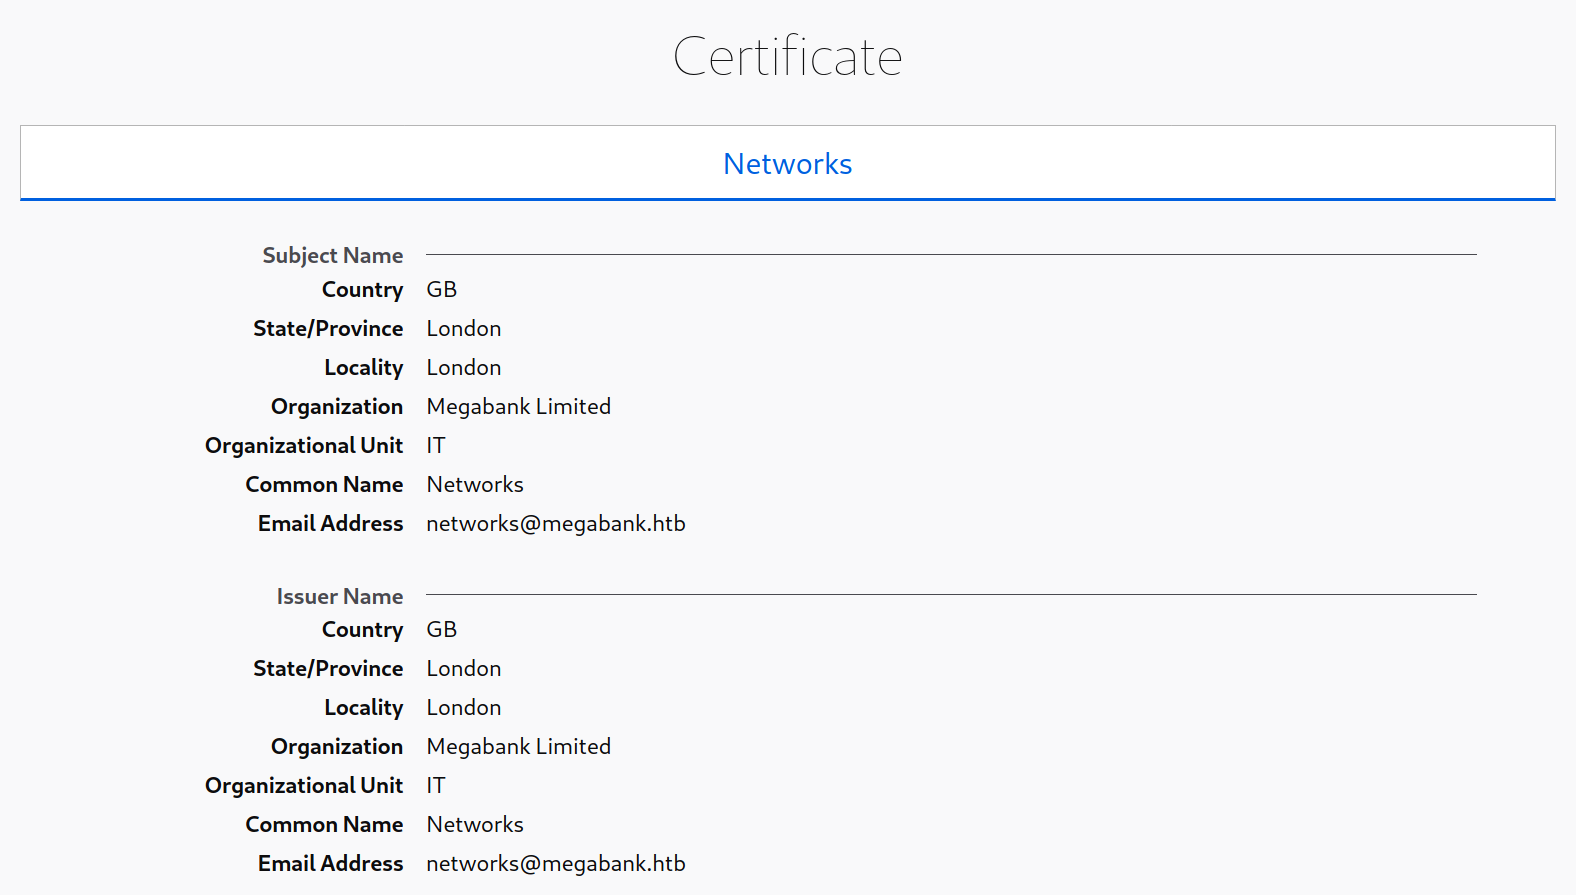
SSL/TLS certificates are another potentially valuable source of information if HTTPS is in use. Browsing to https://10.10.10.121/ and viewing the certificate reveals the details below, including the email address and company name. These could potentially be used to conduct a phishing attack if this is within the scope of an assessment.
Robots.txt
It is common for websites to contain a robots.txt file, whose purpose is to instruct search engine web crawlers such as Googlebot which resources can and cannot be accessed for indexing. The robots.txt file can provide valuable information such as the location of private files and admin pages. In this case, we see that the robots.txt file contains two disallowed entries.

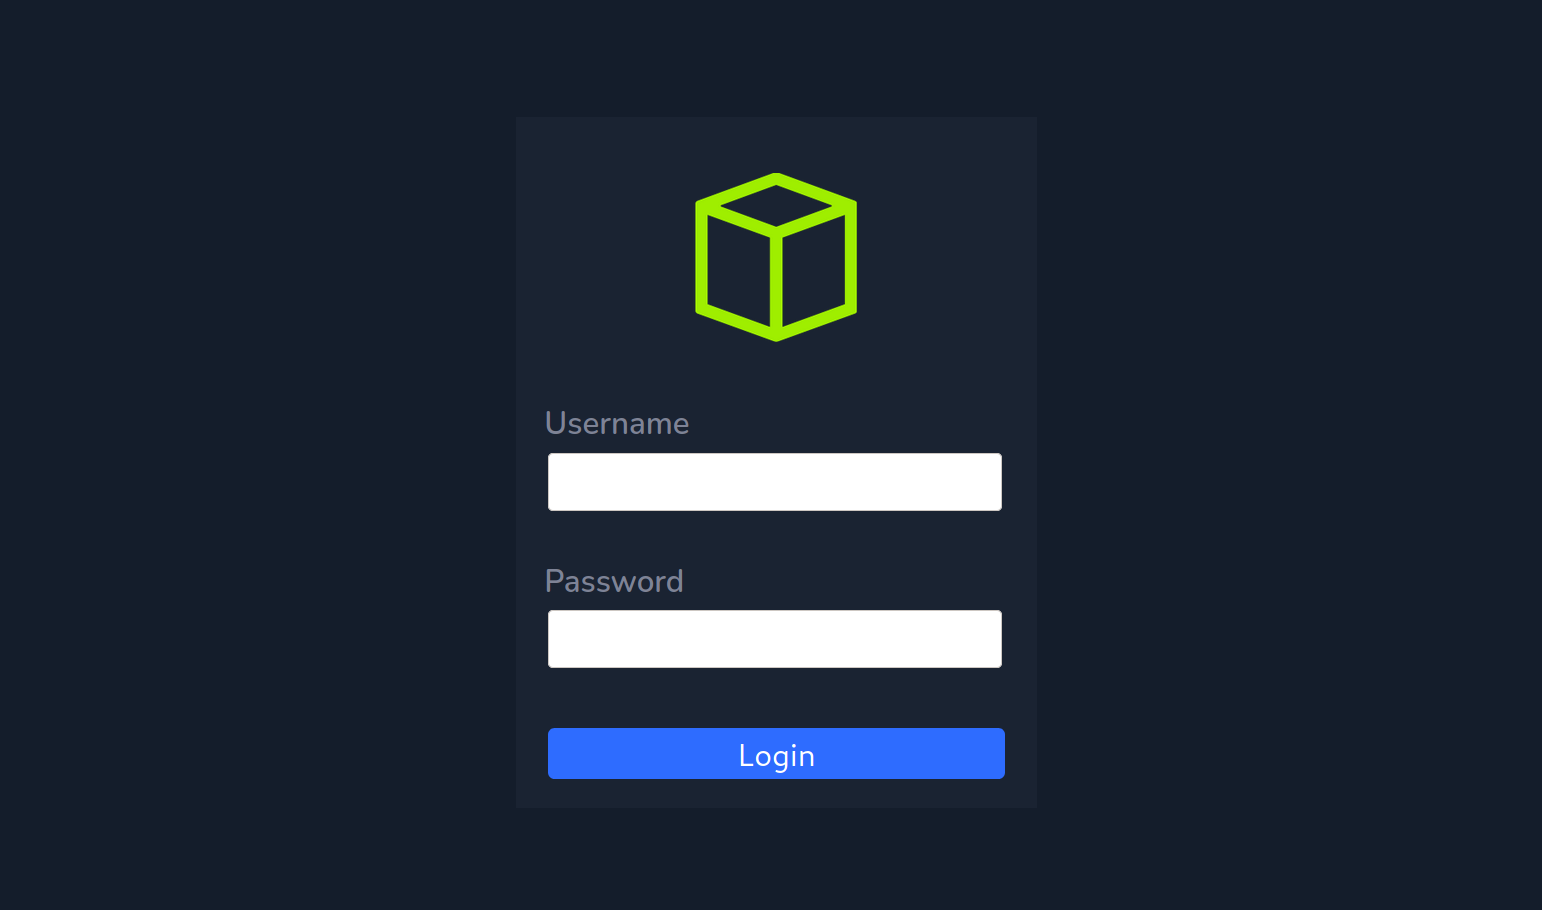
Navigating to http://10.10.10.121/private in a browser reveals a HTB admin login page.
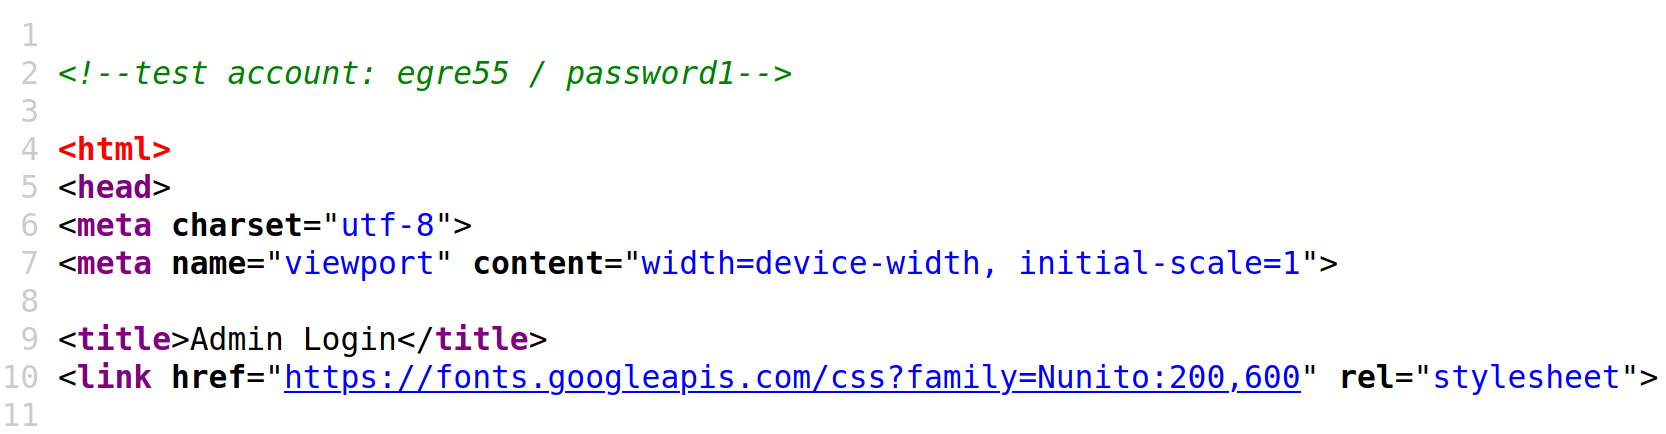
Source Code
It is also worth checking the source code for any web pages we come across. We can hit [CTRL + U] to bring up the source code window in a browser. This example reveals a developer comment containing credentials for a test account, which could be used to log in to the website.
HTTP Status Codes Cheatsheet
1xx — Informational
- 100 Continue → Request received, continue sending
- 101 Switching Protocols → Server switching protocols (e.g., WebSockets)
- 102 Processing → WebDAV: Request received, processing continues
- 103 Early Hints → Preload resources before final response
2xx — Success
- 200 OK → Standard success
- 201 Created → Resource successfully created
- 202 Accepted → Request accepted, processing later
- 203 Non-Authoritative Information → Modified response from proxy
- 204 No Content → Success, but no body
- 205 Reset Content → Reset document view
- 206 Partial Content → Partial data (range requests)
- 207 Multi-Status → WebDAV: Multiple statuses
- 208 Already Reported → WebDAV: Duplicate reference suppressed
- 226 IM Used → HTTP Delta encoding
3xx — Redirection
- 300 Multiple Choices → Multiple options available
- 301 Moved Permanently → Resource permanently moved
- 302 Found → Temporary redirect
- 303 See Other → Redirect to another resource (GET)
- 304 Not Modified → Resource not changed (cache)
- 305 Use Proxy → Deprecated: Use proxy
- 306 Switch Proxy → Unused (reserved)
- 307 Temporary Redirect → Temporary, method preserved
- 308 Permanent Redirect → Permanent, method preserved
4xx — Client Errors
- 400 Bad Request → Invalid request syntax
- 401 Unauthorized → Authentication required
- 402 Payment Required → Reserved (used for payments, limited use)
- 403 Forbidden → Client authenticated, but not allowed
- 404 Not Found → Resource not found
- 405 Method Not Allowed → Method not supported by resource
- 406 Not Acceptable → Content not acceptable
- 407 Proxy Authentication Required → Proxy auth needed
- 408 Request Timeout → Server timeout waiting for client
- 409 Conflict → Conflict with current resource state
- 410 Gone → Resource permanently removed
- 411 Length Required → Missing
Content-Length - 412 Precondition Failed → Precondition headers fail
- 413 Payload Too Large → Request body too large
- 414 URI Too Long → Request URI too long
- 415 Unsupported Media Type → Media type not supported
- 416 Range Not Satisfiable → Invalid range request
- 417 Expectation Failed → Expect header unmet
- 418 I’m a teapot → Joke (RFC 2324)
- 421 Misdirected Request → Sent to wrong server
- 422 Unprocessable Entity → WebDAV: Semantically invalid
- 423 Locked → WebDAV: Resource locked
- 424 Failed Dependency → WebDAV: Dependency failed
- 425 Too Early → Retry risk
- 426 Upgrade Required → Client must use different protocol
- 428 Precondition Required → Server requires conditions
- 429 Too Many Requests → Rate limiting
- 431 Request Header Fields Too Large → Headers too large
- 451 Unavailable For Legal Reasons → Censored/blocked
5xx — Server Errors
- 500 Internal Server Error → Generic server error
- 501 Not Implemented → Server doesn’t support functionality
- 502 Bad Gateway → Invalid response from upstream server
- 503 Service Unavailable → Server temporarily overloaded/unavailable
- 504 Gateway Timeout → Upstream server timeout
- 505 HTTP Version Not Supported → Unsupported HTTP version
- 506 Variant Also Negotiates → Configuration error
- 507 Insufficient Storage → WebDAV: Storage full
- 508 Loop Detected → WebDAV: Infinite loop
- 510 Not Extended → More extensions required
- 511 Network Authentication Required → Network login required (e.g., captive portal)
Quick Reference
- 2xx = Success
- 3xx = Redirection
- 4xx = Client Error
- 5xx = Server Error